HTML Form tags, Form, input (text box, password, button, submit, textarea) and form attributes
| Site: | Philippine Science High School - MC - Knowledge Hub |
| Course: | SY25.CS3.Web Development |
| Book: | HTML Form tags, Form, input (text box, password, button, submit, textarea) and form attributes |
| Printed by: | , Guest user |
| Date: | Tuesday, 14 April 2026, 2:41 AM |
1. Introduction
After completing this module, you are expected to:
- Design a simple form as user information input
In real life situations, you are asked multiple times to fill up forms printed on paper. You supply information about yourself and other data regarding the topic that the form is intended for.
Remember when you applied for a PSHS scholarship? Below is a screenshot of the application form where you supply your information to PSHS in order for you to take the exam. Notice the spaces allotted for an applicant to write their information in. These spaces are represented either as rectangles for writing or boxes for checking or numbers.
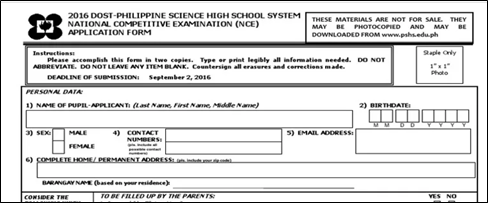
Figure 1 PSHS-NCE Application Form
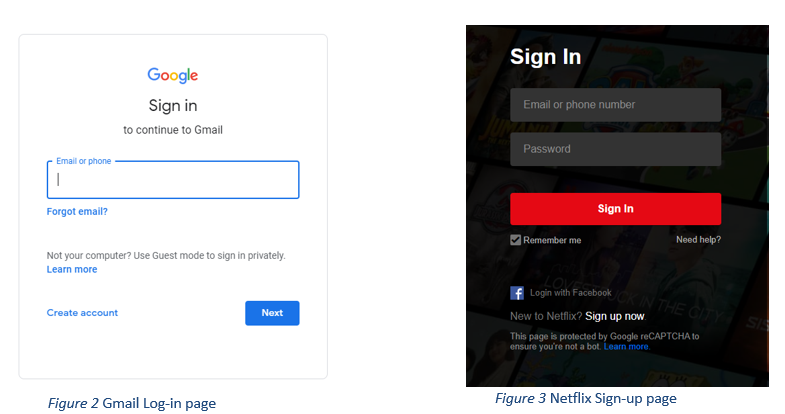
People can also supply information in electronic form. Web Pages also collect information from users in order to render services with the use of an online form. Users are asked to supply data about themselves like email address, username and password. Forms can be seen in log-in pages, sign-up pages, and others. Below are some screenshots of webpages that ask input from the user.
So far, we have learned only a single way of
asking for input from the user. This is by using the prompt() method where a
pop-up appears with a text box and a message for the user. For this module, we
will learn new HTML tags that enable users to type-in information through the
browser.
The HTML tags that we will learn accept different kinds of inputs. One tag accepts single line text only, another accepts only numbers, dates, etc.
2. HTML Form Tag
HTML Form tags are a group of tags that accepts input from the users. A single form can contain multiple tags that accept different inputs. The <form> tag is used to group different form elements together. Given below is a code snippet on how to use the <form> tag.
</form>
The action attribute is used to indicate where the data inside the form will be sent to. For the example above, the data will go to somepage.html. The action will only be conducted when the user triggers an event. Later in this module, you will learn that submit button which can be clicked to trigger the action.
Now, let us discuss the different types of form tags. We will focus first on the HTML tag <input>. There are different types of input tags depending on the data type that they will accept and we will discuss some them below: (please refer to: https://www.w3schools.com/html/html_form_input_types.asp for a complete list of the input types).
2.1. Text Field
A Text field accepts a single line of text. The HTML element for this is <input type="text">. This means that the input tag accepts text. Notice the use of id and name as attributes for the input tag in the sample code below. During the previous modules, we know that the id attribute is used to access the HTML element in CSS and JS. The name attribute is used to refer to the HTML form element and will be used by the browser when a form is submitted.
Refer to the code below for a demonstration on how to use input with text type.
<input type="text" id="userName" name="userName">
Note that the sample code above also used the <label> tag. This tag is used before the input tag to indicate what a form element is for. The attribute for is used to indicate which form tag it is labeling. The value for this attribute is the name of the form tag that it is referring to, which is in the example, refers to “userName” and when the user clicks on the label the browser focus will automatically go to the input tag in this case.
Output:
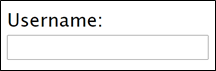
2.2. Password
Password is used to accept password input from the user. When the user is typing, the characters are displayed as black circles instead of the character being typed.
<input type = "password" id="pWord" name="password">
</form>
Output:

2.3. Number
Number is used to accept numeric values from the user. Notice in the code below that there are additional attributes used for this type of input. The attributes min and max are used to set a limit for the numbers to be entered by the user.
Notice also the up and down arrow at the end of the box. You can click on these to increase or decrease the number. When there is no value, the starting number is one. If you do not see any number in your input box, do not worry. This is dependent on the browser. Safari is one browser that does not support these arrows.
<input type="number" id="age" name="age" min="1" max="100">
</form>
Output:

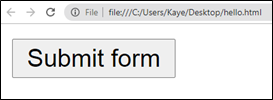
2.4. Button
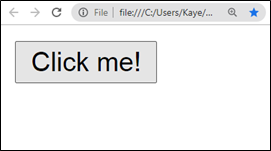
Button is used to create a clickable button and call a script or a function when the user clicks on this element.
</form>
Output:
2.5. Submit
</form>
Output:

2.6. Reset
Reset is used to create a button that restores all input areas into their default values when clicked. If there is no specified default value, the default value is blank.
</form>

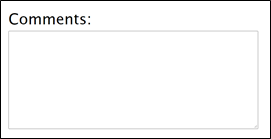
2.7. Text Area
<textarea id="tArea" name="comments" rows="4" cols="50"> </textarea>
</form>
Output:
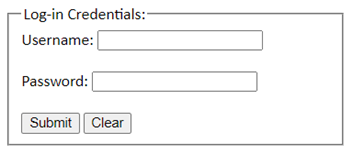
2.8. Fieldset and Legend
The fieldset tag is used to put related form elements together in a group. Remember during our first quarter how div and span elements were used to group together related HTML elements. Field set works the same way. Using this element helps the programmer to organize data better for the website.
Field set has an attribute form that takes the id of forms as values. By using this attribute, the fieldset can be associated with the form indicated even if it is not inside the form itself.
Meanwhile, the legend tag is used to label the field set. Legends are to field sets as the label element is to form elements. Refer to the sample code below to see an example of the use of fieldset and legend.
<legend>Log-in Credentials: </legend>
<label for="userName">Username:</label>
<input type="text" id="userName" name="userName"><br><br>
<label for="pword">Password:</label>
<input type="password" id="pword" name="pword"><br><br>
<input type="submit" value="Submit">
<input type="reset" value="Clear">
</fieldset>
</form>
Output:
3. Form Attributes
Like all HTML elements that we have learned during the first and second quarter, form tags also have attributes. Here are some attributes that we can use in class:
● autocomplete – used to complete values in input boxes based on values that the user has typed in previous sessions on the same browser. As long as the user did not clear out the history records of the browser, the autocomplete feature will have values to refer to.
● disabled – is an attribute that does not take any value. By adding this attribute, you can inhibit the user from typing into the form element where it is placed until a condition is met.
One tip when you want to disable multiple form elements, add this attribute to the field set containing them. By adding the disabled attribute to the field set, you can disable all form elements in one go instead of typing disabled on each individual form element.
● novalidate – is used to tell the browser that it should not check the correctness of inputted values in the form. Browsers have their own input checker and will alert the user if the input is incorrect, even if the programmer did not add any script for checking. One example is if the page has a <input type=“number”> and the user attempts to type in a letter, the browser will tell the user that it is an invalid entry. The novalidate attribute overrides this feature of browsers. This is especially helpful when we are adding a save feature to website forms so that users can continue filling up the form at a later session.
● name – used to add a name to the form. This works like an id and a class name.
● target – used to define where the user inputs will be displayed after the form is submitted. This works like the target attribute for links.
There are other form attributes available such as action, method, and enctype but these attributes are used when processing the forms on the server-side. This is not covered in Computer Science 3 but you may read more on it if you are interested.
4. Summary and References
Summary
In this module, we have learned that:
● HTML forms are used to accept inputs from the user.● There are different types of form tags. This include
o <label>
o <input type=“text”>
o <input type=“password”>
o <input type=“number”>
o <input type=“button”>
o <input type=“submit”>
o <input type=“reset”>
o <textarea>
o <fieldset>
o <legend>
● The <form> tag has different attributes that can be used according to the needs of the website.
References
MDN Contributors. (2021, February 20). <input type="button">. Retrieved from MDN Web Docs: https://developer.mozilla.org/en-US/docs/Web/HTML/Element/input/button
MDN Contributors. (2021, February 20). <input type="submit">. Retrieved from MDN Web Docs: https://developer.mozilla.org/en-US/docs/Web/HTML/Element/input/submit
W3Schools. (n.d.). HTML <input type="button">. Retrieved from w3schools.com: https://www.w3schools.com/tags/att_input_type_button.asp
W3Schools. (n.d.). HTML Form Attributes. Retrieved from w3schools.com: https://www.w3schools.com/html/html_forms_attributes.asp
W3Schools. (n.d.). HTML Form Elements. Retrieved from w3schools.com: https://www.w3schools.com/html/html_form_elements.asp
W3Schools. (n.d.). HTML Forms. Retrieved from w3schoools.com: https://www.w3schools.com/html/html_forms.asp
W3Schools. (n.d.). HTML Input Types. Retrieved from w3schools.com: https://www.w3schools.com/html/html_form_input_types.asp
W3Schools. (n.d.). HTML <input type="reset">. Retrieved from w3schools.com: https://www.w3schools.com/tags/att_input_type_reset.asp
ManasChhabra2. (2019, April 22). HTML| action Attribute. Retrieved from geeksforgeeks.org: https://www.geeksforgeeks.org/html-action-attribute/#:~:text=The%20HTML%20%7C%20action%20Attribute%20is,in%20the%20element.&text=Attribute%20Values%3A,the%20submission%20of%20the%20form
W3Schools. (n.d.). HTML <form> action Attribute. Retrieved from w3schools.com: https://www.w3schools.com/tags/att_form_action.asp
W3Schools. (n.d.). HTML <fieldset> Tag. Retrieved from w3schools.com: https://www.w3schools.com/tags/tag_fieldset.asp
MDN Contributors. (2021, February 20). <fieldset>: The Field Set element. Retrieved from MDN Web Docs: https://developer.mozilla.org/en-US/docs/Web/HTML/Element/fieldset
W3Schools. (n.d.). HTML <legend> Tag. Retrieved from w3schools.com: https://www.w3schools.com/tags/tag_legend.asp